Our Negative Keywords Tool has been helping clients save on ad spend being wasted on irrelevant keywords. We have now and then added features to make it overly useful and hands-on. One such feature that we would like to touch on is the “Must-Add” negative keywords.
What is Must-Add Negative Keywords?
We launched the Must Add Negative Keywords, last December to make it easier for advertisers to add negative keywords to their Google Ads account. The main objective of the details shown in this tab is to reduce the time spent on fetching for negative keywords.
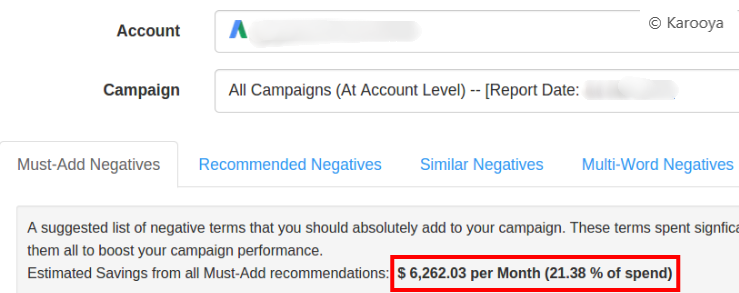
This tab displays a list of recommended terms that haven’t been driving valuable conversions. These are highly recommended to be added in your campaign as they have significantly used the ad spend allocated for your paid search campaign.
These recommendations are filtered basis a conservative approach. Ideally, the listed negative keywords either have a higher CPA than the average CPA of the campaign or have a low volume of conversions. For instance, your campaign CPA is 10$, while a certain keyword “free” has a CPA of 30$, then that keyword will be displayed here.
Also, keywords with significantly low conversion volume will also get listed. For instance, a keyword with fewer than 5 conversions will also be recommended in the Must-add negatives. However, in cases where CPAs are higher and so is the volume, you might not want to add them as negative keywords, such keywords will not be listed here as other positive factors come into the picture.
It is suggested to add all the recommended terms as negative keywords as the amount of conversions lost is disproportionate to the budget saved. So, though you might lose 1% of your conversion, but end up saving 10% on your budget.
It also gives you an estimate of how much you will end up saving on your ad spend if the recommended negative keywords are added.

How to use it?
To view the Must-Add negative keywords, follow the following steps:
Step 1: Go to your account dashboard and select all campaigns or an individual campaign
Step 2: Go to Must-Add tab. (you will be directly taken to the tab, as it is the default one)
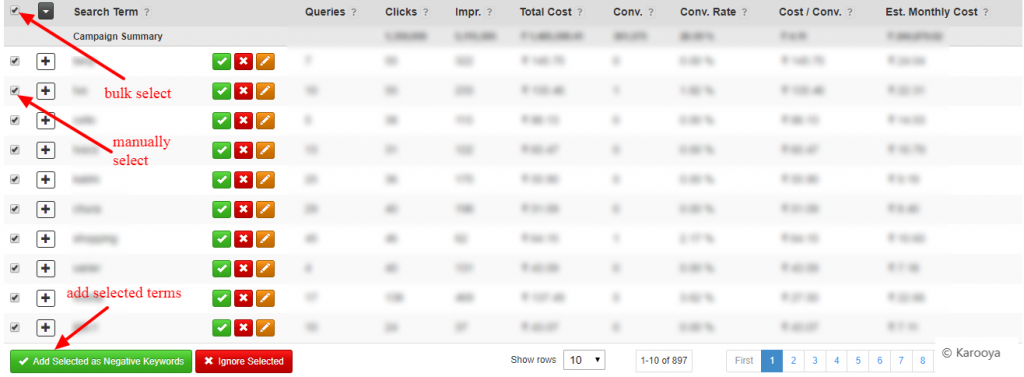
Step 3: Increase the number of suggestions per page to 100. Scan the recommendations.
Step 4: Bulk-Select all the recommendations or manually select the ones you wish to add
Step 5: Add the selected terms as negative keywords
Step 6: Repeat, if there are more than 100 suggestions
If you are at the campaign then the selected negative keywords get added to the campaign directly. But, if you are at the account then the negative keywords gets added to the default negative keyword list, specified by you.
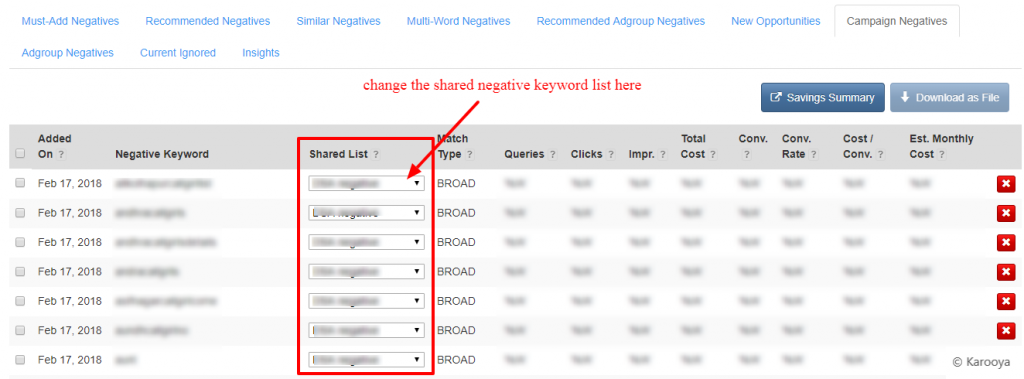
You can change the default list or move the keyword to a different list by doing the following:
Step 1: Go to Campaign Negatives tab
Step 2: Scroll down to the Negative Keyword Lists and select the list you want to add as default. (To this default list, the negative keywords will be added)
Step 3: You can later revisit this tab and change the negative keyword list to which a term has been assigned.
Go ahead! Give our negative keywords tool a try to save time and money. Now, this tool is Free for accounts with ad spend less than $10,000 per month. Save 10-20% of your search ad spend for free.
Related Links:


Stop the wasted ad spend. Get more conversions from the same ad budget.
Our customers save over $16 Million per year on Google and Amazon Ads.