We have recently created a handy Google Ads Script that compares the Search Terms Trends for the time period chosen by you.
With this script you can understand the following:
- You can identify search terms that are losing impressions, clicks or conversions. It could be because you lowered bids recently; or because your competitor has started bidding aggressively. In both cases, if the search term is important for your business and/or if the search term converts well for you, you should increase your bids
- To observe increase/decrease in cost (avg CPC) for the important search terms. It can indicate change in competitiveness and/or impact of seasonality on a search term.
- You can compare the data year on year to see how account’s behaviour has changed over last one year. While month on month the changes might appear small, over a year, and need not be a cause of worry, these changes accumulate. Year on year helps you magnify those changes.
- The terms that are showing growth in impressions can be of help to your colleagues working on SEO. Data of paid search provides an early indication of the trend and it can be used to improve organic ranking.
Now how is this script different from Native Search Term Comparison available in Google Ads?
If you are comparing the search terms report from an account level, then in Google Ads, the search terms will be displayed for each ad group. If similar keyword is used across multiple ad groups then you will see the comparison drawn for all those multiple ad groups. Thus, you don’t get to see the cumulative performance change of a single keyword across your account.
But, with our script that purpose is solved. We give you insight into the search terms from an account level. The data that you get access to, is of the search terms from all the campaigns and ad groups clubbed together. This helps in getting a holistic view of how the search terms have been performing.
The Script & The Report
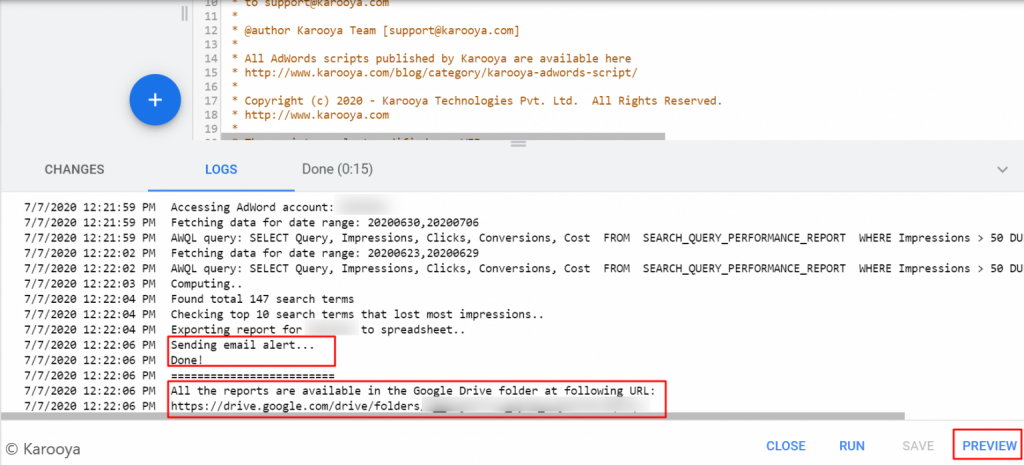
Add the variable components as per your requirement (details mentioned below). Run the script and review the file sent on your email address or copy the link of the Google Drive file.

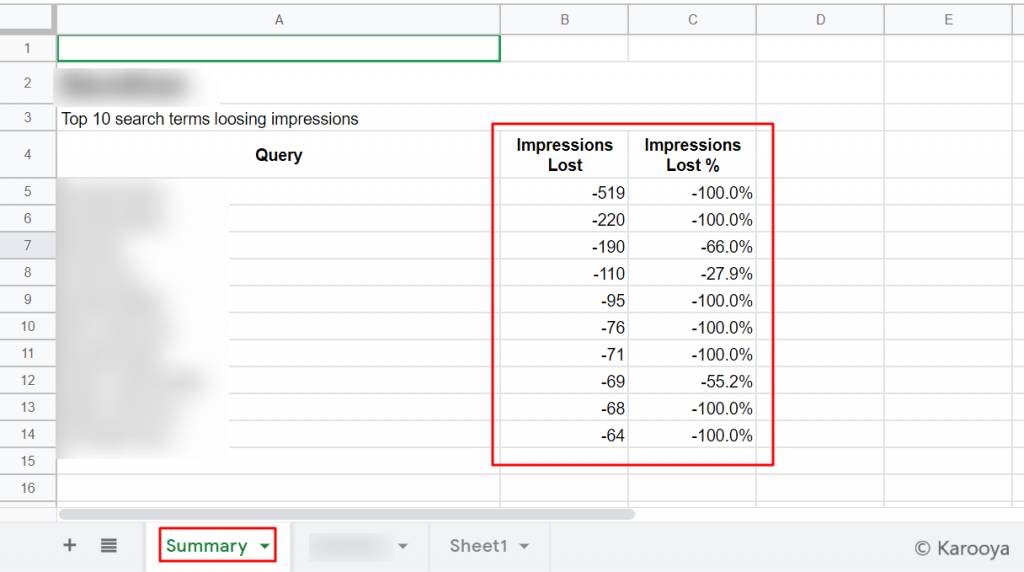
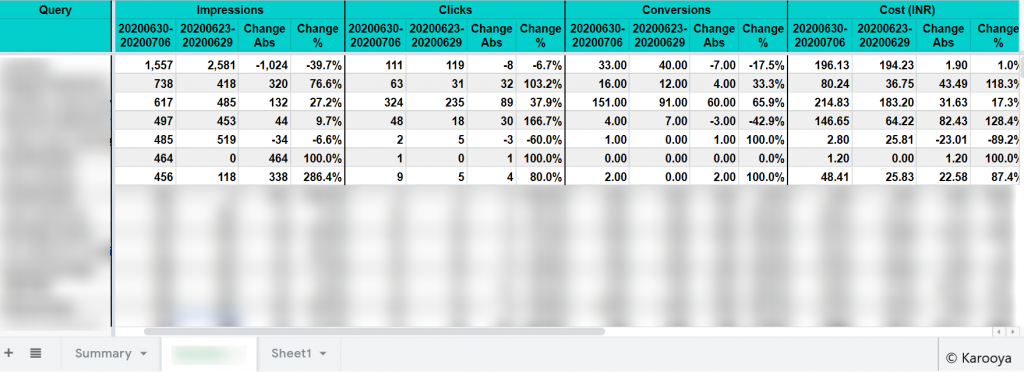
Here is a look at the file that you will get access to:

The first sheet consists of the summary of the findings. It lists the top 10 search terms that have lost impressions during the time period chosen by you.
The second sheet contains the detailed insight of your search terms for the time period chosen by you. The comparison is drawn on the four key metrics:
- Impressions
- Clicks
- Conversions
- Cost

Comparing Performance using Custom_Date_Range
Since this script is about comparing the search trends for two time periods, either the variables DATE__RANGE or CUSTOM_DATE_RANGE need to necessarily be specified.
Use the CUSTOM_DATE_RANGE variable to define the time period that you wish to compare the search terms for (you need to turn the flag “true” to activate the variable)
For. e.g. you can compare performance of June 2020 vs that of May 2020 this year. Here is how you will pass the data in the variable.
START_DATE1=”2020-06-01″ END_DATE1=”2020-06-30″
START_DATE2=”2020-05-01″ END_DATE2=”2020-05-31″
Or you could compare the performance of June 2020 with that of June 2019. Here is how you will pass the data in the variable.
START_DATE1=”2020-06-01″ END_DATE1=”2020-06-30″
START_DATE2=”2019-06-01″ END_DATE2=”2019-06-30″
Similarly you can also compare Q2, 2020 performance with Q1, 2020 or Q2, 2020 with Q2, 2019 etc.
If you want to use predefined ranges, then the following options are fed in the script (DATE_RANGE) for you to choose:
- LAST_7_DAYS_VS_PREV
- LAST_30_DAYS_VS_PREV
- LAST_90_DAYS_VS_PREV
- LAST_<NUM>_DAYS_VS_PREV – In this, add the number of days you wish to compare in the place of <NUM>. So, if it is 60 days that you wish to compare with the past 60 days, the variable will be written as LAST_60_DAYS_VS_PREV
Here are the variables that you can change to customize it to your requirement:
- DATE_RANGE – By default this is set to LAST_7_DAYS_VS_PREV, but you can choose other predefined date ranges such as “LAST_90_DAYS_VS_PREV”, “LAST_30_DAYS_VS_PREV”, or define the range by adding the value in <NUM> in “LAST_<NUM>_DAYS_VS_PREV”
- USE_CUSTOM_DATE_RANGE – If you want to use a custom range then turn this flag to “true” and then specify the START_DATE and END_DATE for the two date ranges that you wish to compare. The date should be written in <yyyy-mm-dd> format
- MIN_IMPRESSIONS – This will exclude search terms having less than the minimum impressions. By default the value is set to 50.
- EMAIL_RECIPIENT – Here insert the email id where you wish to receive notification about the generated report
- IS_MCC_ACCOUNT : This flag is to indicate whether you will be running this script at MCC-level. By default, it is set to false. Change it to “true” if you want to use for all the linked accounts in your MCC account. The results for each account will be stored in two separate sheets – one with raw data and one has the summary. Be careful, if you have many many accounts.
- FILTER_ACCOUNTS_BY_IDS – If your MCC account has tons of linked accounts, you may not wish to run this script for all account IDs then turn this flag to “true” and specify the variable in ACCOUNT_IDS_TO_SELECT. Only the account IDs mentioned here will be analyzed.
- FILTER_ACCOUNTS_BY_LABEL – If your MCC account has tons of linked accounts, you may not want to run this script for all the accounts. In that case, turn this flag to “true” and then specify the label with ACCOUNT_LABEL_TO_SELECT variable. Only the accounts with the specified label will be analyzed to generate this report.
- REPORTS_FOLDER_PATH – This is the path to the folder in Google Drive where all the reports are to be created. By default the name is set to ‘Search Term Trend Reports’
Once again, click here to get the script
Related Links:


Stop the wasted ad spend. Get more conversions from the same ad budget.
Our customers save over $16 Million per year on Google and Amazon Ads.