We recently covered how negative keywords could be added in AdWords Editor. In continuation to that series, we in this post, take you through the step-by-step process of adding negative keywords in your Bing account via Bing Ads Editor.
Here are the quick steps to go about adding your negative keywords:
Step 1: Go to your campaign in Bing Ads Editor
Step 2: Now, go to the ‘Keywords‘ tab, and then to the ‘Negatives‘ tab
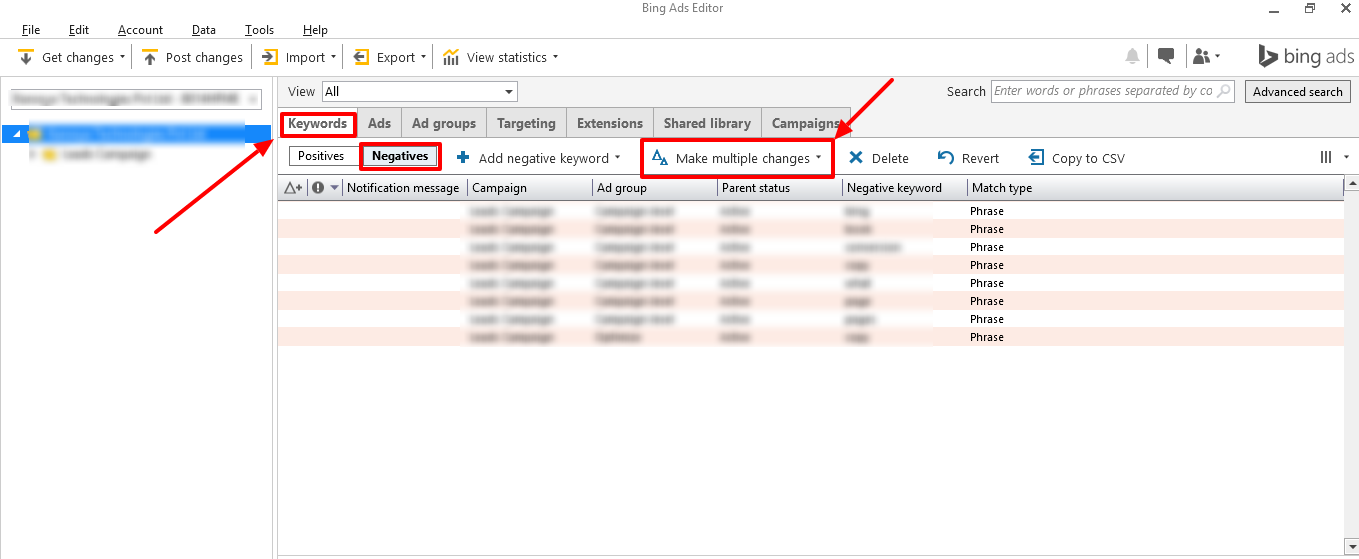
Step 3: Click on ‘Make multiple changes‘ and choose the eligible option
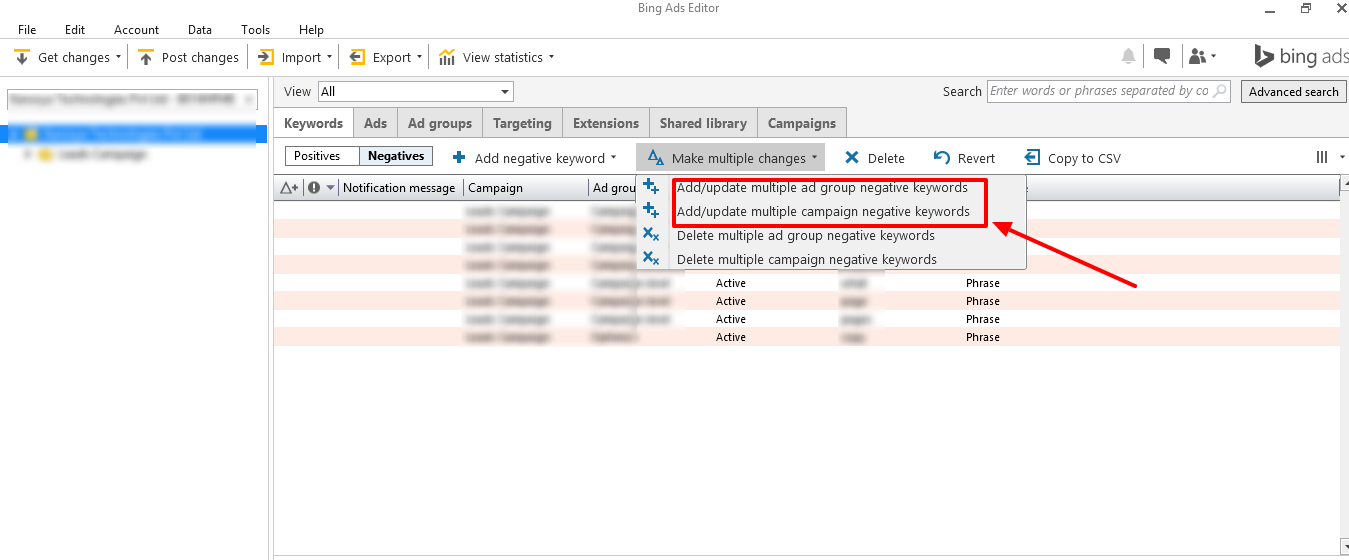
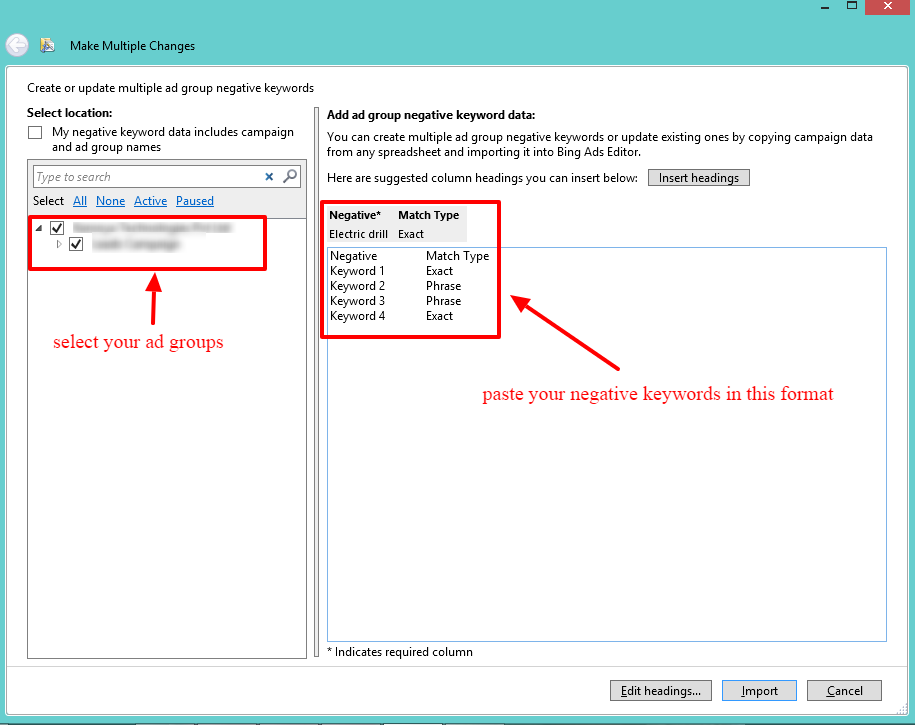
Step 4: From the following pop-up, you can choose the ad groups and the campaigns to which you want to add negative keywords. Thereafter you can copy paste the negative keywords in the format as specified.
Or you can specify the ‘campaign’ and ‘ad group’ in your data fields and copy paste it in the space provided
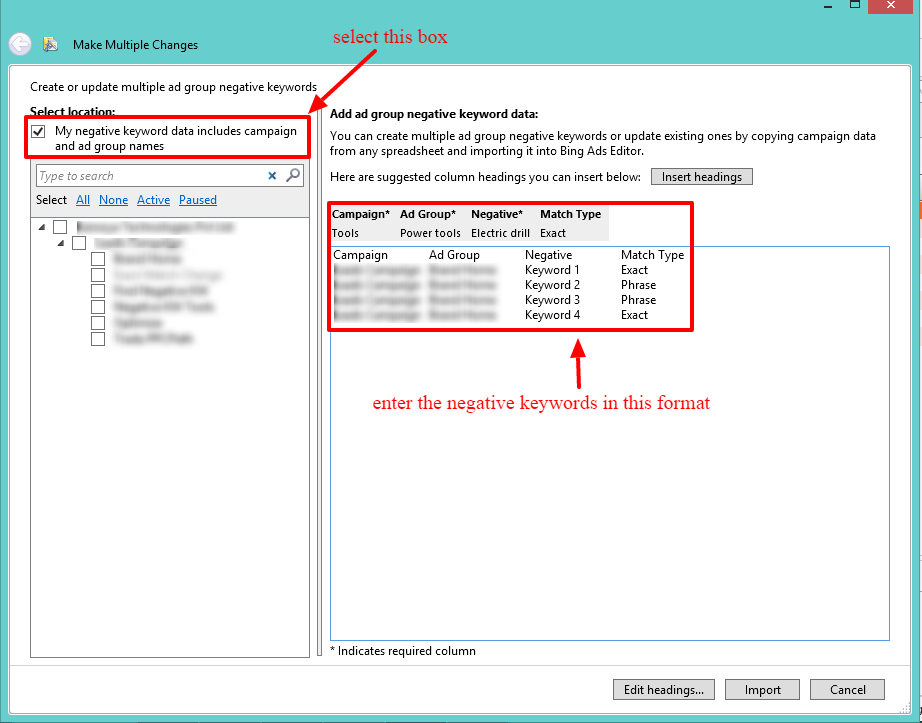
Note: Here we are adding negative keywords to select ad groups
Step 6: After pasting the negative keywords, click on ‘Import’
Step 7: Your import will be processed in a couple of seconds
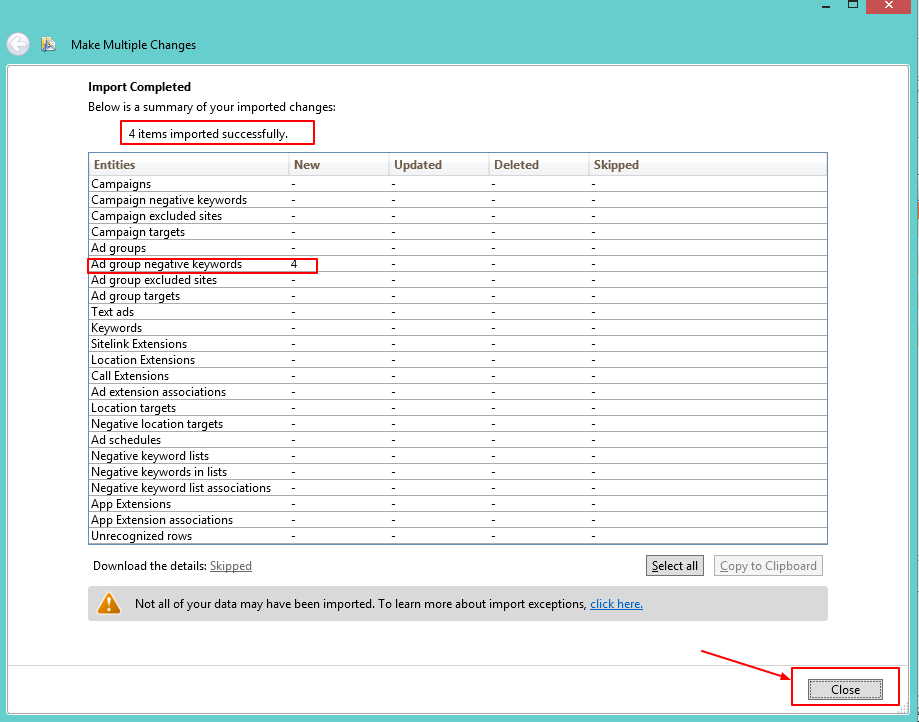
Step 8: The following page displays the summary of the import
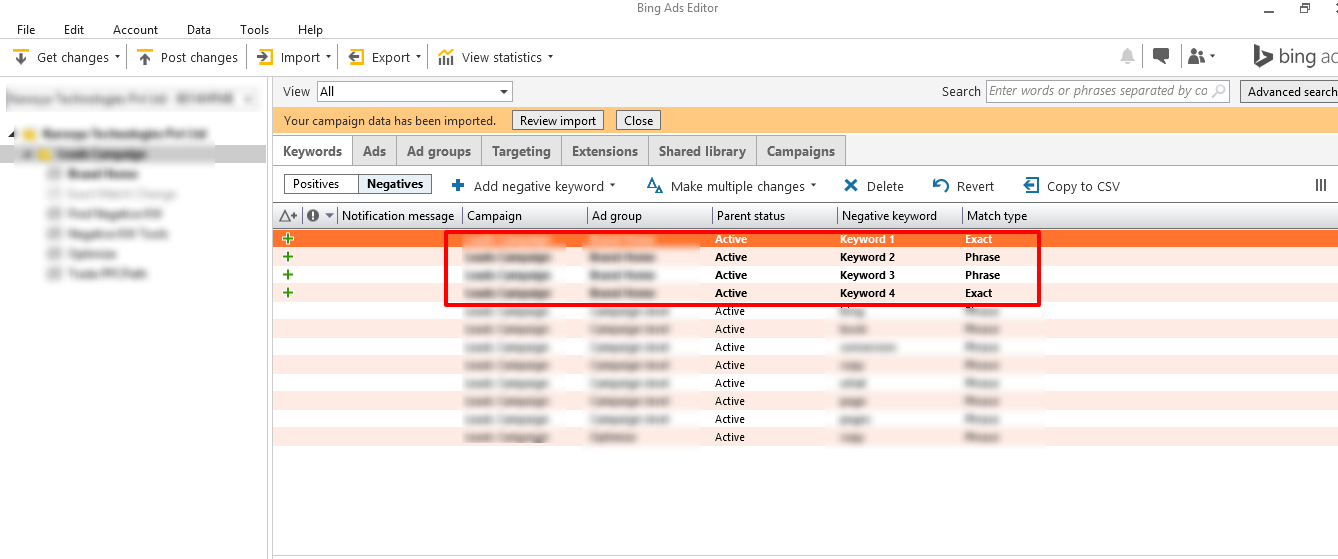
Step 9: Review your recently imported negative keywords
Now, that the process is simplified you can seamlessly add negative keywords across multiple campaigns/ ad groups easily. Further, finding negative keywords is a pretty tedious task, so you might want to give Karooya’s Negative Keyword Tool a try and get all the help in finding all those irrelevant terms that are driving to your website. Save unwanted ad spend in minutes with the tool that reduces all the manual effort.
Note: We offer free negative keywords tool for Amazon Ads with a generous free tier. Know more here
Related Articles:


Stop the wasted ad spend. Get more conversions from the same ad budget.
Our customers save over $16 Million per year on Google and Amazon Ads.